
Quick Summary
When an automated driveway gate fails to operate, systematic automatic gate opener troubleshooting helps isolate whether the issue stems from power loss, sensor misalignment, or mechanical drag before investing in expensive replacements. Checking breakers, cleaning photo-eye lenses, and releasing the manual clutch to test for track friction resolve most operational stalls, while Ironworks Gate Co. stands ready with same-day dispatch when complex motor or board failures require professional repair. Readers will learn how to perform safe step-by-step diagnostic checks, reset operator travel limits, and determine when to schedule a professional on-site gate assessment.
Automatic Gate Opener Troubleshooting – Fix It Fast
When an automatic driveway gate refuses to budge, hums without moving, or reverses halfway across the drive, it instantly disrupts your day. Before replacing expensive parts or booking a service call, systematic automatic gate opener troubleshooting can help you identify whether the breakdown is electrical, sensor-related, or mechanical. Prioritizing physical safety is essential whenever working around heavy automated gates. The most recent widely cited federal estimate is the CPSC’s 2011-2015 analysis published in 2018, with about 300 emergency-room injuries per year. Additionally, a 2026 case review found troubleshooting-related activity in a majority of the retained fatal and severe-case records, though this is not a population-wide rate. Public neutral-source statistics on automatic gate opener troubleshooting are limited, and the procedural guidance throughout this article is based on general troubleshooting practice rather than verified population statistics.[1]
General handymen and garage door contractors often misdiagnose electronic controls or suggest full system replacements when an inexpensive adjustment is all that is required. At Ironworks Gate Co., we focus on component-level repairs, replacing only what is actually broken. Our technicians carry replacement parts across Anaheim and greater Orange County to resolve gate issues on the first visit. Work through the general diagnostic advice below to isolate the root cause, or contact our team for a fast on-site assessment.[4]
Automatic Gate Opener Troubleshooting: Fast Diagnostic Summary
Quick Diagnostic Summary (General Advice): To troubleshoot an automatic gate opener, first check your electrical breaker and exterior GFCI outlets. Next, clean and align your photo-eye safety sensors. Test remotes and keypads for fresh batteries. Disengage the manual release key to test whether the gate glides freely by hand. If the motor hums but will not turn, inspect the control board diagnostic LEDs for fault codes before resetting travel limits.
Based on general troubleshooting practice, most gate opener failures stem from three common issues: an interrupted power supply, blocked safety photo eyes, or mechanical drag that trips the motor’s built-in safety sensors. Isolating physical friction before modifying electronic settings saves hours of guesswork.[5]
Key Checks Before Calling for Service (General Advice)
- Verify Electrical Supply: Confirm that the dedicated breaker, master power switch, and exterior GFCI outlets are delivering steady voltage.
- Clean and Align Photo Eyes: Wipe away dirt, cobwebs, and moisture so the safety beams maintain an unbroken line of sight.
- Check Manual Operation: Disengage the operator clutch to check if track friction, worn rollers, or a sagging hinge post are jamming the gate.
Safety Precautions for Automatic Gate Systems
Always release the drive mechanism before inspecting heavy swing arms or slide gate rollers by hand. Because automated gates operate under significant mechanical force, keeping hands clear of pinch points, chains, and drive gears is mandatory during diagnostic tests. If your inspection reveals structural sagging, heavy hinge bind, or burned circuit components, professional service ensures the system is repaired safely.
What You Need Before Troubleshooting Your Electric Gate Opener
Before opening any electrical enclosures, collect a few standard hand tools and locate your manual release key. Checking for physical resistance by hand helps you determine whether the issue is mechanical before you test any live wiring.
Essential Tools and Equipment
- Digital multimeter: Measures incoming line voltage, transformer output, and battery health.
- Insulated screwdriver set: Allows safe access to control panels and terminal wiring.
- Microfiber cloth: Cleans dust, grit, and cobwebs off photo-eye lenses.
- Silicone-based lubricant: Smooths stiff hinges, rollers, and chain links without attracting dirt.
- Fresh batteries: Eliminates dead transmitters as the source of remote control issues.
Locating Your Operator Manual and Key Release
Your manual release key lets you disengage the drive arm, belt, or chain so you can swing or slide the gate manually. Case reviews highlight that servicing active machinery carries inherent risks, making manual disconnects the safest starting point for any physical inspection.[2]
Step 1: Verify Power Supply, Breakers, and Motor Fuses (General Advice)
When an electric gate opener fails to turn on, start by confirming that electrical power reaches the operator. Outdoor electrical connections are frequently interrupted by moisture-tripped GFCI outlets, tripped breakers, or blown low-voltage fuses.
Inspecting the Dedicated Circuit Breaker and GFCI Outlets (General Guidance)
High motor draw or moisture intrusion can trip outdoor protection circuits. Follow these general checks to verify electrical feed:
- Check the main electrical panel and reset the dedicated breaker for the gate.
- Press the reset button on the weatherproof GFCI outlet box supplying the operator.
- Use a digital multimeter to verify correct line voltage (typically 115V or 230V AC) at the main terminal block.
Checking Solar Panels and Backup Battery Voltage
For solar-powered or battery-backed systems, general advice suggests testing each 12V sealed lead-acid battery under load. Any battery showing under 12.0V DC when the motor attempts to run typically requires replacement. Next, check the automotive blade fuses located on the main circuit board. A simple fuse swap often restores power immediately without needing a new control board.
Step 2: Inspect, Clean, and Realign Safety Photo-Eye Sensors
Need automatic gate opener troubleshooting?
We’re available now - call for a fast, free estimate.
Step 2 Summary (General Advice): Clean the optical lenses and check that indicator LEDs on both sensor units glow solid. A flashing or dark LED commonly indicates beam misalignment, low voltage, or a physical obstruction. In general trade experience, if your gate opens normally but refuses to close, misaligned photo eyes are frequently a primary factor.
As explained by Ironworks Gate Co., safety photo eyes project an invisible infrared beam across your driveway. If that beam is broken, the operator logic prevents the gate from closing to protect vehicles and pedestrians.
Clearing Physical Obstructions and Environmental Debris
In Southern California, dry Santa Ana winds frequently coat sensor lenses with dust, while spiders often spin webs across the housing. General maintenance steps include:
- Wipe both emitter and receiver lenses with a clean microfiber cloth to remove dirt, insect residue, and water spots.
- Trim back overgrown landscaping, tall weeds, or low tree branches along the driveway edge.
Reading Diagnostic Sensor Status LEDs (General Guidance)
Look directly at the LED status indicator on the receiving photo-eye unit. As general guidance, a solid green or red light typically confirms an active, unbroken beam, whereas a flashing or unlit LED suggests misalignment or power loss. Loosen the mounting bracket slightly, pivot the sensor until the indicator light burns solid, and tighten the hardware down.
Step 3: Test Remote Controls, Keypads, and Access Wiring
If the gate has power and the safety eyes are clear, the issue may stem from your access controls. A stuck keypad button, failed radio receiver, or shorted ground loop can hold the gate open indefinitely.
Eliminating Transmitter Signal and Battery Failures
Install fresh batteries in your handheld remotes and check for radio frequency interference from nearby LED floodlights or wireless equipment. If the gate cycles using the onboard open/close button inside the operator box but ignores your handheld clickers, the issue generally lies in the remote battery, the remote’s programming, or the external antenna wire.
Checking Hardwired Keypads and Loop Detectors
Accessory wiring issues frequently send continuous open commands to the logic board. To isolate the accessory at fault:
- Disconnect external trigger wires (such as keypads, intercoms, or edge sensors) from the control board terminals one at a time.
- Check underground exit loop detectors. Ground moisture from heavy rain or irrigation can lock a detector into a permanent detection state.
Step 4: Check for Mechanical Resistance and Entrapment Amperage Trips
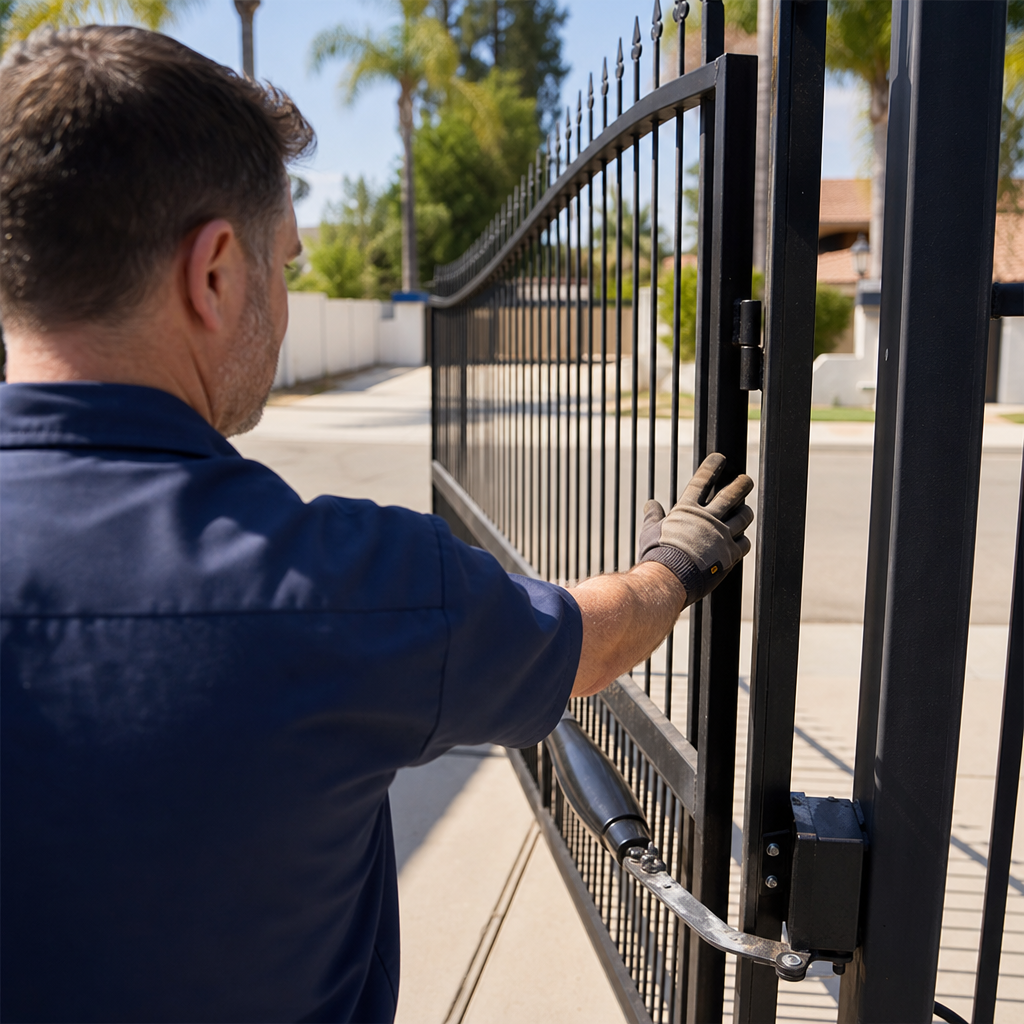
When an automatic gate stops midway through its cycle or immediately reverses, the problem is often mechanical rather than an electrical board failure. The motor’s built-in entrapment protection detects physical drag and cuts power to avoid burning out the motor or crushing an object.
Testing Swing Gate Hinges and Slide Gate Tracks by Hand
- Unlock the operator clutch or drive arm using your manual release key.
- Move the gate by hand through its entire open and close travel path.
- Feel for stiff hinge pivots, bent slide tracks, gravel jammed in the V-groove, or post sag causing the bottom of the gate to drag across the concrete.
Understanding Motor Current Overload vs Electrical Board Failure
Modern gate operators monitor current draw (amperage). On steep driveways, such as those found throughout Anaheim Hills, or on older iron gates with dry hinge pins, the motor must exert extra force to push the gate. This resistance causes the motor to draw excess amps. The logic board interprets this amperage spike as an obstruction and shuts down immediately.
Diagnosing physical drag before replacing electronics prevents property owners from paying for unnecessary motor or board replacements. If the gate does not move effortlessly by hand, lubricate the hinges, clear the ground track, or adjust post leveling before recalibrating travel limits.
Step 5: Read Control Board Diagnostic LEDs and Error Codes
Modern control boards feature diagnostic LEDs that flash specific pulse sequences to indicate operational faults. Counting these flashes reveals the exact reason the gate is halted before you touch any wiring.
Interpreting Diagnostic Flash Codes
Refer to the diagnostic chart on the inside cover of your operator housing or your owner’s manual. Common flash codes identify specific issues such as safety beam lockouts, low battery backup voltage, or thermal motor overloads. Checking these visual codes provides immediate clarity without requiring board removal.
Identifying Blown Capacitors and Relay Failure (General Diagnostic Advice)
As general diagnostic advice, if an AC motor hums loudly when triggered but fails to rotate the drive arm or chain sprocket, a faulty or swollen starter capacitor is a common potential cause. Capacitors store starting current; when they degrade, the motor may struggle to generate enough initial torque to move.
Step 6: Reset the Gate Operator Limits and Motor Settings
Need automatic gate opener troubleshooting?
We’re available now - call for a fast, free estimate.
If power fluctuations, physical stalls, or battery drains cause the operator to lose track of its position, a complete logic reset and limit relearn will restore smooth travel.
Executing a Hard Power Cycle Reset (General Guidance)
To clear temporary microprocessor faults from the logic board:
- Turn off the main AC breaker and unplug the backup battery harness.
- Press and hold the board reset button for 15 seconds to discharge residual power from the capacitors.
- Wait 60 seconds before reconnecting the battery harness and turning the main AC power back on.
Relearning Open and Close Travel Limits
Once power is restored, enter the operator’s limit-setup mode following the manufacturer instructions:
- Jog the gate to the fully open position and set the open limit switch, magnetic stop, or optical encoder reference.
- Jog the gate to the closed position and save the close limit.
- Run two full, uninterrupted test cycles so the board learns normal running resistance and calibrates its built-in force settings.
Common Automatic Gate Opener Brands (General Industry Examples)
Gate operators operate under demanding conditions, and different manufacturers require distinct diagnostic approaches. Common industry brands encountered in residential and commercial settings include LiftMaster, DoorKing (DKS), Viking Access, and Nice Apollo.
LiftMaster and Chamberlain Professional Operators
From residential CSW24U swing operators to commercial CSL24U slide units, LiftMaster systems feature diagnostic displays and monitored safety inputs. Technicians carry compatible control boards, surge suppressors, and plug-in loop detectors for repairs.
DoorKing (DKS), Viking Access, and Nice Apollo Systems
DKS 6050 vehicular swing operators, solar Nice Apollo 1550 systems, and Viking T-21 operators require precise torque calibration and correct limit switch alignment. Using factory-spec replacement parts helps ensure long-term reliability and prevents recurring electrical callbacks.
What Does Automatic Gate Opener Troubleshooting and Repair Cost? (Estimated Ranges)
Automatic gate repair pricing depends on whether the problem involves basic mechanical realignment, sensor replacement, or motor rebuilding. The following figures represent general estimated industry ranges:[3]
Estimated Gate Repair Price Breakdown (General Industry Ranges)
Targeted repairs cost significantly less than replacing an entire operator assembly. Typical estimated industry pricing ranges include:
- Diagnostic service call: $49 – $150 (estimated range)
- Photo-eye sensor realignment or replacement: $120 – $280 (estimated range)
- Slide gate track and roller repair: $150 – $400 (estimated range)
- Hinge rebuild and post realignment: $175 – $450 (estimated range)
- Control board or motor capacitor replacement: $220 – $550 (estimated range)
- Complete operator replacement: $850 – $2,500+ (estimated range)
Why Accurate On-Site Diagnostics Protect Your Budget
When an automated gate fails, less experienced repair services often recommend an expensive motor replacement when an amperage overload was simply caused by a dry hinge or track debris. Methodical testing ensures that mechanical issues are corrected before functional electrical components are replaced.
| Service Approach | Component-Level Diagnostic Approach | General Handyman Approach | Standard Garage Door Tech Approach |
|---|---|---|---|
| Mechanical Drag Testing | Tested first before board swaps | Often overlooked | Rarely prioritized |
| Diagnostic Method | Systematic step-by-step isolation | Trial-and-error part replacement | Focus on full unit replacement |
| Component Focus | Targeted repairs of failed parts | General mechanical adjustments | Standard assembly replacement |
Frequently Asked Questions About Automatic Gate Opener Repair
Why is my automatic gate opener not opening all the way?
A gate that stops partially open is usually responding to physical resistance or misadjusted travel limits. If the bottom of the gate drags on uneven concrete, or if dirt packs into the track, the motor current rises and trips the internal entrapment sensor. Disengage the gate, test the travel by hand, and adjust the limit nuts or learn settings once the path is clear.
How do I reset my electric driveway gate opener?
To perform a hard reset based on general troubleshooting advice, shut off the main breaker feeding the operator and disconnect the 12V backup battery harness. Leave the system unpowered for 60 seconds to fully drain the circuit board memory. Reconnect power and run the operator through a complete open and close cycle to confirm travel limits.
Why does my automatic gate keep opening and closing on its own?
Uncommanded cycling (phantom opening) is typically caused by a shorted access accessory or a faulty exit loop. Moisture inside hardwired push-button boxes, corroded keypad terminals, or radio frequency interference can send false open triggers to the board. Disconnecting accessories one by one helps isolate the faulty device.
How do I know if my gate opener sensor or photo eye is faulty?
Check the indicator lights on both photo eyes as a general diagnostic step. The receiving sensor should display a steady light when the path is clear. If the LED flashes or remains dark after you clean the lenses and align the brackets, test the input terminal on the control board for proper 12V/24V power.
What should I do if my gate opener remote stops responding?
First, replace the coin-cell battery in the remote. Next, check if other remotes, wireless keypads, or wall buttons still operate the gate. If none of the wireless controls work, inspect the operator’s external antenna wire to ensure it is not pinched, cut, or touching metal framing.
When should I call a professional gate repair technician instead of DIY troubleshooting?
As recommended by Ironworks Gate Co., basic cleaning, battery changes, and manual resistance checks are straightforward DIY tasks. However, high-voltage electrical work, structural post welding, gearbox rebuilds, and troubleshooting heavy gates on steep grades should be handled by a licensed professional equipped with specialized diagnostic tools.
Need automatic gate opener troubleshooting?
We’re available now - call for a fast, free estimate.
Sources
- Newsroom – FOIA – cpsc.gov (2026)
- Aviation Safety Reporting System: ASRS – asrs.arc.nasa.gov (2026)
- Injury patterns and epidemiology of automatic door-related … – pubmed.ncbi.nlm.nih.gov (2024)
- Garage Door Operators/Gate Operators | CPSC.gov – cpsc.gov (2003)
- Research and Reports – cpsc.gov
Frequently Asked Questions
What does it mean if my automatic gate opener motor hums loudly but the gate will not move?
A humming gate motor that fails to rotate the drive mechanism typically points to a degraded starter capacitor, low operating voltage, or a seized internal gearbox. If disengaging the clutch proves the gate moves freely by hand, Ironworks Gate Co. can test motor windings and replace failing electronic components to restore power.
Why does my electric driveway gate malfunction during cold or wet weather?
Cold weather drops 12V backup battery capacity below the minimum operating threshold, while rain and morning condensation can trip sensitive GFCI outlets or fog photo-eye lenses. Moisture intrusion can also short underground exit loop detectors, causing the logic board to misread vehicle presence.
How often should an automatic driveway gate system receive professional servicing?
Residential automatic gates should be professionally inspected at least once a year, whereas high-traffic commercial gates require bi-annual maintenance. Routine visits from Ironworks Gate Co. ensure swing hinges stay lubricated, entrapment amperage settings remain calibrated, and control board surge protection is fully operational.
About the author
 |
David Harrison David Harrison is a seasoned technical writer with over eight years of experience specializing in the access control and home security industries. Holding a Bachelor’s degree in Communications from California State University, Fullerton, he translates complex gate repair diagnostics and pricing structures into clear, actionable advice for property owners. David’s practical insights help Orange County residents and businesses navigate automatic gate maintenance with confidence and transparency. |
Gate not opening, off track, or opener dead?
We’re available now - call for a fast, free estimate.
Call Now - Free Estimate